
Step by Step Card Printing: A Small Business Guide
TL;DR:
- Proper file setup, including CMYK color mode, 300 DPI resolution, and a 3mm bleed, is essential for professional card printing. Selecting the right materials, printer type, and conducting test prints with lightbox overlays prevent common errors like misalignment, dull colors, or paper jams. Finishing with accurate cuts and surface treatments enhances the card’s quality, making it look professional rather than homemade.
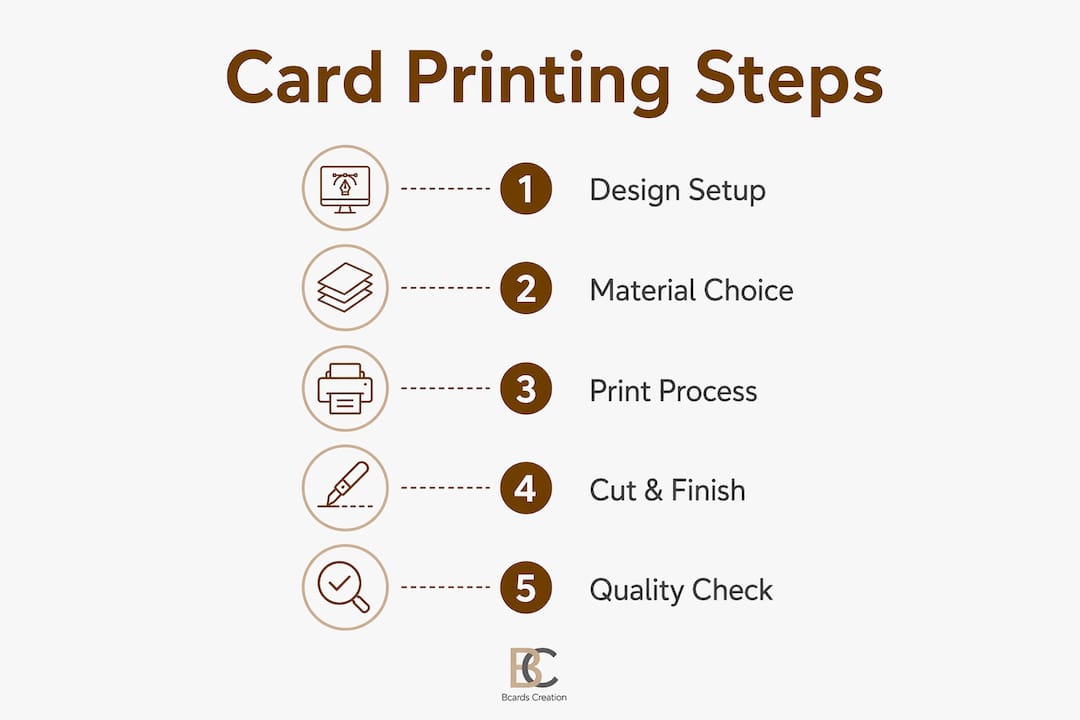
Step by step card printing is the systematic process of preparing, designing, and producing custom cards to achieve professional, print-ready results. Done correctly, it covers everything from file setup and color mode to material selection, test prints, and finishing. This guide walks you through each stage using tools like Adobe Illustrator, Canva Pro, and Inkpress, with practical advice on cardstock, printer types, and post-print finishing. Follow these steps and you will avoid the most common mistakes that turn a good design into a disappointing physical card.
How to set up your card design file for print
File preparation is where most card printing mistakes begin. Getting this stage right means your printed card will match what you see on screen.

Document size and bleed
Start by setting your document to standard business card dimensions: 3.5 x 2 inches in the US. Then add a 3mm bleed on all sides to protect against cutting errors. Bleed is the extra artwork that extends beyond the trim line. Without it, any slight shift during cutting leaves a thin white border on the card edge.
Color mode
Print-ready files require CMYK color mode, not RGB. RGB is built for screens and produces colors that printers cannot accurately reproduce. Converting to CMYK before you export prevents dull or shifted colors in the final print. This single step eliminates one of the most common complaints in DIY card printing.
Resolution
Set your file to a minimum of 300 DPI. Lower resolution looks fine on screen but prints soft and blurry. 300 DPI is the 2026 printing standard for sharp, professional output on any cardstock.
Safe zones and fonts
Keep all critical content, text, logos, and contact details at least 3mm inside the trim line. This is your safe zone. Anything closer risks being clipped during cutting. Before you export, outline or embed all fonts. Outlined fonts convert to vector shapes, so the printer does not need your font files to reproduce the design accurately.
Choosing your design tool
Adobe Illustrator gives you full control over CMYK, bleed, and vector artwork. It is the industry standard for print-ready card design. Inkpress generates print-optimized PDFs with trim marks built in. Canva Pro supports CMYK export, but you must manually configure bleed settings and verify the export options. Without a Pro subscription, Canva exports RGB only, which will cause color shifts at the printer.
| Tool | CMYK Support | Bleed Setup | Best For |
|---|---|---|---|
| Adobe Illustrator | Native | Manual, full control | Professional designers |
| Canva Pro | Yes (manual) | Manual, limited | Quick layouts |
| Inkpress | Yes | Automated | Print-ready PDF output |
Pro Tip: Export your final file as a PDF with trim marks and crop marks visible. This gives the printer or cutting tool a precise reference for where to cut.
What materials and printer should you use?
Material choice directly affects how your card feels in someone’s hand. That tactile impression shapes how they perceive your brand before they read a single word.
Cardstock weight and finish
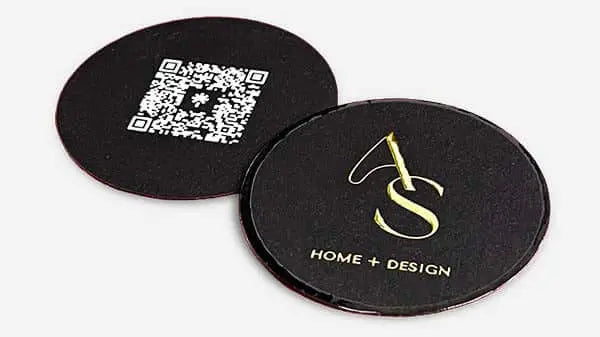
For home printing, 300gsm matte cardstock is the most reliable choice. It feeds more consistently than glossy stock and produces clean, readable text. Glossy finishes look sharp but can cause ink smearing with inkjet printers and are prone to fingerprints. If you want a premium feel, explore specialty card materials before committing to a large print run.
Printer type matters
- Inkjet printers produce rich color and work well with matte cardstock. They are slower and ink can smear if cards are handled too quickly after printing.
- Laser printers are faster and more durable for text-heavy designs. They handle glossy stock better but can crack thick cardstock during the fusing process.
- Rear-feed or manual bypass trays are the right choice for heavy stock. Most home printers use bottom-loading trays with a U-turn paper path that jams on cardstock over 200gsm. A straight paper path through a rear slot prevents this entirely.
The carrier sheet method
Standard printers often cannot grip small cards reliably. The fix is simple: tape your card to a standard 8.5 x 11 sheet of paper, adjust your artwork position to match, and feed the carrier sheet through the printer. Carrier sheets allow precise feeding on small or heavy stock without skewing or jams. This technique works for both inkjet and laser printers.
Pro Tip: Run a test sheet of your cardstock through the printer with no ink to confirm it feeds cleanly before you commit to a full print run.
What are the steps for the actual printing process?
The printing stage is where preparation pays off. Follow these steps in order to minimize wasted materials and catch errors early.
- Set custom paper size in printer settings. Open your printer preferences and enter the exact dimensions of your cardstock. Select the highest quality or photo print mode for color accuracy.
- Load cardstock correctly. Use the rear-feed slot if available. For bottom-loading printers, load only a few sheets at a time to reduce jam risk. Fan the stack before loading to prevent sheets from sticking together.
- Print a test on plain paper first. Print your design on a standard sheet at full size. This costs nothing and reveals layout or scaling problems before you touch your cardstock.
- Check registration with the lightbox method. Hold your test print against the cardstock with a bright light behind both sheets. This overlay shows whether your design aligns correctly with the card edges and safe zones. It is a low-tech method that catches alignment issues invisible on screen.
- Adjust and retest if needed. If the design is off-center or too close to an edge, correct the file and run another plain paper test. Do not skip this step for a bulk run.
- Print the final run. Once the test confirms alignment, print your cards. Do not stack them immediately. Let inkjet prints dry for at least 60 seconds before stacking to prevent smearing.
- Order a physical proof for large batches. For orders over 500 cards, request a physical proof before the full run. A proof confirms color accuracy, material weight, and tactile feel in a way that no screen preview can replicate.
Pro Tip: Print in small batches of 10–20 cards at a time. This lets you catch any drift in color or alignment before it affects the entire run.
How do you finish and trim cards professionally?
Printing is only part of the process. How you cut and finish the cards determines whether they look homemade or professional.
Cutting tools and technique
Trim marks guide precise cutting and should be visible on your printed sheet. For home use, a rotary trimmer is the most reliable tool. It produces straight, consistent cuts and handles multiple sheets at once. A craft knife and metal ruler work for single cards but require a steady hand and a self-healing cutting mat.
- Rotary trimmer: Best for straight cuts on multiple sheets. Consistent and fast.
- Craft knife and ruler: Good for single cards or custom shapes. Requires practice.
- Guillotine cutter: Fast for stacks but less precise on small formats without proper alignment guides.
Always cut outside the safe zone and inside the bleed area. Never cut through live content. Clean edges improve the tactile impression of the card and signal attention to detail.
Surface finishing options
| Finish Type | DIY Option | Professional Result | Best For |
|---|---|---|---|
| Matte lamination | Cold lamination film | Smooth, non-reflective | Minimal, text-heavy designs |
| Gloss lamination | Gloss lamination film | High shine, vivid color | Photo-heavy or bold designs |
| Soft touch | Protective spray (limited) | Velvet-like texture | Premium brand positioning |
| No finish | None needed | Clean, natural paper feel | Uncoated specialty stock |
Surface finishes like lamination protect cards from wear and add a tactile quality that reinforces brand perception. Cold lamination films are the most accessible DIY option and work well on inkjet prints. Protective sprays simulate a light coating but do not match the durability of laminated cards.
How do you fix the most common card printing problems?
Most printing problems trace back to a small number of root causes. Knowing what to look for saves time and materials.
Color looks dull or flat
This almost always means the file was designed in RGB and not converted to CMYK before export. Reconvert the file, re-export, and reprint. Also check that your printer is set to its highest color quality mode.
White edges appear after cutting
Missing or insufficient bleed is the cause. Go back to your design file, extend all background elements and colors to the bleed boundary, and re-export. A 3mm bleed on all sides is the standard fix.
Paper jams
- Check that your printer has a straight paper path. Bottom-load printers with U-turn paths jam on stock over 200gsm.
- Use the rear-feed slot or manual bypass tray.
- Try the carrier sheet method for small or heavy cards.
- Load fewer sheets at a time.
Misaligned prints
Run a plain paper test and use the lightbox overlay method to identify the offset. Adjust the artwork position in your file, not the printer settings, for precise corrections.
Physical proofs are not optional for bulk orders. Digital previews show layout but cannot confirm how ink sits on a specific paper stock or how a finish feels under pressure. A proof is the only reliable quality check before committing to a full run.
Fonts printing incorrectly
If text looks wrong or substituted, the fonts were not outlined or embedded before export. Return to your design file, outline all text, and re-export as a PDF.
Key takeaways
Successful card printing depends on correct file preparation, the right equipment, and a disciplined test-and-proof process before any full run.
| Point | Details |
|---|---|
| File setup is non-negotiable | Use CMYK color mode, 300 DPI resolution, and 3mm bleed on every file before export. |
| Printer type affects outcome | Rear-feed or bypass tray printers handle heavy cardstock without jams or curling. |
| Test before you commit | A plain paper test with a lightbox overlay catches alignment errors before wasting cardstock. |
| Finishing defines perception | Clean cuts and surface treatments like lamination separate professional cards from home-printed ones. |
| Proofs protect bulk orders | Physical proofs confirm color, feel, and material accuracy in ways digital previews cannot. |
What i have learned from getting card printing wrong
I spent years watching clients bring in files that looked perfect on screen and printed terribly. The pattern was always the same: RGB files, no bleed, fonts not outlined. The mistakes were not careless. They came from not knowing what print production actually requires.
The most underestimated step is the test print. People skip it because it feels slow. But a two-minute test on plain paper, held against cardstock under a light, has saved more print runs than any software setting. It is a physical check that no preview window replaces.
Material choice is where I see the biggest gap between intention and result. A designer picks a beautiful card concept, then prints it on whatever cardstock is in the drawer. The card feels thin and generic. The design deserved better. Matching the stock weight and finish to the brand message is not a detail. It is the point.
My honest advice: do not treat the printing process as a technical afterthought to the design. The card printing workflow is part of the design. Every decision from color mode to cutting method affects what the person holding the card experiences. Get that right and the card does its job.
— Kostiantyn
How Bcardscreation can handle this for you
If you have worked through this guide and realized the process is more involved than expected, that is a normal conclusion. Professional card printing requires precise file preparation, the right materials, and controlled production to get consistent results.
Bcardscreation specializes in fully custom, small-batch business cards built without templates. Every project includes expert design guidance, material consultation, and print-ready file preparation. Whether you need custom business card design support or want to explore luxury foil and creative finishes, Bcardscreation handles the production details so the final card reflects your brand accurately. Browse the full range at Bcardscreation to find the right format for your next project.
FAQ
What resolution do business cards need for printing?
Business cards require a minimum of 300 DPI for sharp, professional print output. Files below this threshold print soft or blurry, even when they look clear on screen.
Why do my printed cards look different from the screen design?
The most common cause is designing in RGB color mode instead of CMYK. Printers cannot reproduce RGB colors accurately, which results in dull or shifted tones in the final print.
How do i print small cards without them jamming?
Use the carrier sheet method: tape the card to a standard sheet of paper, adjust your artwork position to match, and feed the carrier sheet through the printer. This gives the printer enough surface to grip and feed without skewing.
Do i need a physical proof before a large print run?
For orders over 500 cards, a physical proof is recommended to verify color accuracy, material weight, and tactile feel. Digital previews cannot replicate how ink and finish interact on a specific paper stock.
What is the best cardstock for home card printing?
300gsm matte cardstock is the most reliable choice for home printers. It feeds consistently, produces clean text, and works with both inkjet and laser printers without the smearing risk of glossy stock.


